
If you're living with diabetes, monitoring your blood sugar levels is crucial. With so many diabetes test kits available, figuring out which one suits your needs can feel overwhelming. This guide breaks down the essentials of choosing the right diabetes test kit, ensuring you have the tools to manage your condition effectively and confidently. From understanding different types of kits to practical tips for use and maintenance, we've got you covered.
Key Takeaways
- Understand the types of diabetes test kits available, including standard meters and continuous glucose monitors.
- Look for key features like accuracy, ease of use, and how quickly the test provides results.
- Consider your lifestyle and budget when selecting a diabetes test kit.
- Follow a step-by-step guide for effective testing and avoid common mistakes.
- Regularly maintain your diabetes test kit to ensure accurate readings and longevity.
Understanding Diabetes Test Kits

What Is a Diabetes Test Kit?
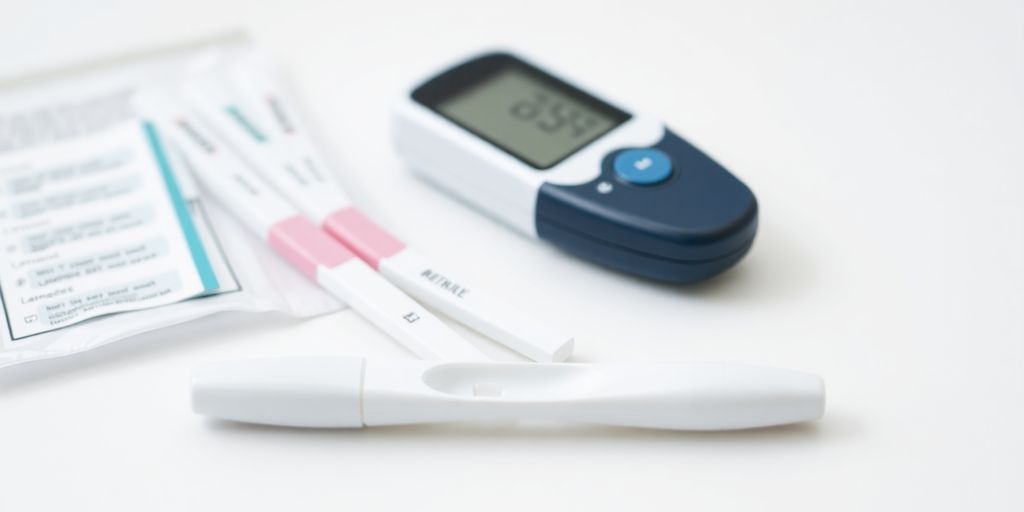
Okay, so what exactly is a diabetes test kit? Simply put, it's a set of tools that lets you check your blood sugar levels at home. Think of it as your personal, on-demand blood glucose lab. It usually includes a meter, test strips, and lancets (those little needle things). It's super handy for keeping tabs on your diabetes management without having to run to the doctor all the time. It's all about convenience and staying informed. You can find various diabetes testing supplies online or at your local pharmacy.
Types of Diabetes Test Kits
There's more than one way to skin a cat, and there's definitely more than one type of diabetes test kit! You've got your standard blood glucose meters, which are the most common. Then there are continuous glucose monitors (CGMs), which are pretty cool because they track your glucose levels all day and night. Plus, there are some kits that are designed to be extra easy to use, which is great if you're not super tech-savvy. Here's a quick rundown:
- Standard Blood Glucose Meters: These use a drop of blood to give you a reading.
- Continuous Glucose Monitors (CGMs): These use a sensor inserted under your skin to track glucose continuously.
- Ketone Meters: These measure ketones in your blood or urine, important for managing type 1 diabetes and preventing diabetic ketoacidosis.
How Do They Work?
Alright, let's break down how these kits actually work. For a standard blood glucose meter, you start by pricking your finger with a lancet. Then, you put a drop of blood on a test strip and insert the strip into the meter. The meter reads the strip and displays your blood sugar level. CGMs are a bit different. They have a tiny sensor that you insert under your skin, usually on your abdomen or arm. This sensor measures your glucose levels in the fluid around your cells and sends the data to a receiver or your smartphone. It's pretty high-tech!
Using a diabetes test kit is like having a window into your body's glucose levels. It gives you the power to make informed decisions about your diet, exercise, and medication, helping you stay in control of your health. It's not just about numbers; it's about empowerment.
Key Features to Look For
Choosing the right diabetes test kit can feel like a big decision, but it doesn't have to be! Let's break down the key features you should consider to make sure you're getting a kit that fits your needs and helps you stay on top of your blood sugar levels. It's all about finding what works best for you.
Accuracy and Precision
Accuracy is super important. You want a meter that gives you reliable readings so you can make informed decisions about your health. Think of it like this: if your meter is consistently off, it's like driving with a speedometer that's always wrong – you'll never really know how fast you're going! Look for meters that meet the current ISO standards for accuracy.
Ease of Use
Let's be real, nobody wants a complicated device adding stress to their day. A user-friendly design is a must! Consider these points:
- Simple Interface: Can you easily navigate the menus?
- Clear Display: Is the screen easy to read, even in different lighting conditions?
- Comfortable Handling: Does the meter feel good in your hand?
A meter that's easy to use will encourage you to test regularly, which is key to managing your diabetes effectively. It's about making the process as smooth and stress-free as possible.
Test Speed and Sample Size
Time is precious, and nobody wants to wait around forever for a blood sugar reading. Plus, smaller blood samples are generally less painful. Here's what to keep in mind:
- Quick Results: Some meters give you a reading in as little as 4 seconds.
- Tiny Sample: Many meters require just a tiny drop of blood these days.
- Alternate Site Testing: Some meters allow you to test on places other than your fingertips, which can be less painful. Consider CGM devices for automatic updates.
Here's a quick comparison table:
| Feature | Benefit |
|---|---|
| Fast Test Speed | Less waiting, more convenient testing |
| Small Sample Size | Less pain, easier for frequent testing |
Choosing the Right Diabetes Test Kit for You
Alright, so you're ready to pick out a diabetes test kit? Awesome! It might seem a little overwhelming with all the options out there, but don't sweat it. We'll break it down to make it super easy. The goal is to find something that fits into your life, not the other way around. Let's get started!
Assessing Your Lifestyle Needs
First things first, think about your daily routine. Are you always on the go, or do you have a pretty set schedule? This makes a big difference. If you travel a lot, you'll want something compact and easy to carry. If you're home most of the time, maybe size isn't as big of a deal. Also, consider how often you need to test. Some people test a few times a day, while others only need to check once in a while. Knowing your testing frequency will help you choose a kit with enough test strips and memory.
Here are some questions to ask yourself:
- How often do I need to test my blood sugar?
- Do I need a kit that's easy to travel with?
- Do I want a meter that can store a lot of readings?
Consulting with Your Healthcare Provider
Seriously, talk to your doctor or a diabetes educator. They know your health history and can give you personalized advice. They can also recommend specific meters or brands that they've had good experiences with. Plus, they can show you how to use the meter correctly and interpret the results. It's always good to get a professional opinion before making a decision. Your doctor can help you understand your personal diabetes plan.
Budget Considerations
Okay, let's talk money. Diabetes test kits can range in price, and it's not just the initial cost you need to think about. You also have to factor in the cost of test strips and lancets, which you'll need to buy regularly. Some meters use more expensive strips than others, so do your research. Look for a kit that fits your budget without sacrificing accuracy or ease of use. The CareSens N Diabetes Testing Kit is a great option for those looking for an affordable solution.
Don't automatically go for the cheapest option. Sometimes, spending a little more upfront can save you money in the long run if the test strips are more affordable or the meter is more reliable. Think of it as an investment in your health!
How to Use Your Diabetes Test Kit Effectively
Alright, you've got your diabetes test kit – awesome! Now, let's make sure you're using it like a pro. It's not rocket science, but following the steps carefully will give you the most accurate results and keep you on top of your blood sugar game. Let's dive in!
Step-by-Step Guide to Testing
Okay, here's the lowdown on how to get the most out of your kit. Don't worry, it gets easier every time!
- Gather Your Supplies: Make sure you have your meter, test strips, lancet device, and alcohol swabs ready to go. Having everything at hand makes the process smoother.
- Wash and Dry Your Hands: Clean hands are key! Use warm water and soap, and dry them super well. This helps avoid any contamination that could mess with your reading.
- Prepare the Lancet: Load a fresh lancet into your lancing device. Adjust the depth setting if needed – you want enough blood without unnecessary ouch.
- Insert Test Strip: Pop a test strip into your meter. Make sure it's the right way around! The meter should turn on automatically, or you might need to press a button.
- Prick Your Finger: Use the lancing device on the side of your fingertip. This area is less sensitive. Gently squeeze your finger to get a small drop of blood.
- Apply Blood to Strip: Touch the edge of the test strip to the blood drop. The strip will suck it up like a tiny sponge. Make sure you get enough blood the first time!
- Wait for Results: Your meter will display your blood sugar reading in just a few seconds. Jot it down in your logbook or app.
- Dispose of the Lancet: Safely toss the used lancet into a sharps container. Keep your family and pets safe!
Common Mistakes to Avoid
We all make mistakes, but here are some to watch out for to keep your readings on point:
- Using expired test strips: These can give you inaccurate results. Always check the expiration date!
- Not using enough blood: Skimping on the blood can lead to error messages or low readings. Be generous!
- Squeezing your finger too hard: This can dilute the blood with tissue fluid, affecting accuracy. Be gentle!
- Not coding the meter correctly: Some meters require you to enter a code that matches the test strip lot number. Don't skip this step!
- Storing your kit in extreme temperatures: Heat and cold can damage the meter and strips. Keep it in a cool, dry place.
Interpreting Your Results
So, you've got a number – now what? Understanding what your blood sugar reading means is super important. Here's a quick guide, but remember to always chat with your doctor about what's right for you.
- Fasting Blood Sugar: This is your blood sugar level after not eating for at least eight hours, usually measured first thing in the morning. A normal range is generally between 70-100 mg/dL.
- Postprandial Blood Sugar: This is measured 1-2 hours after eating. A target range is often below 140 mg/dL.
- A1C: This test provides an average of your blood sugar levels over the past 2-3 months. The goal for many people with diabetes is below 7%.
Remember, these are just general guidelines. Your target range might be different based on your age, health conditions, and treatment plan. Always consult with your healthcare provider to determine what's best for you. They can help you understand your target range and adjust your treatment as needed.
And that's it! With a little practice, you'll be a blood sugar testing whiz in no time. Keep up the great work!
Maintaining Your Diabetes Test Kit
Okay, so you've got your diabetes test kit. Awesome! But just like your car, it needs a little TLC to keep it running smoothly. Don't worry, it's not rocket science. A little maintenance goes a long way in ensuring you get accurate readings and avoid unnecessary hassles. Let's dive into how to keep your kit in tip-top shape.
Cleaning and Care Tips
Think of your test kit as a kitchen utensil – you wouldn't leave food caked on it, right? Same goes for your meter. Here's the lowdown on keeping things clean:
- Wipe it down: Use a slightly damp, soft cloth to wipe down your meter after each use. Avoid getting moisture into the ports. A quick wipe keeps dust and debris from messing with the readings.
- Sanitize occasionally: Every now and then, use an alcohol wipe to give your meter a more thorough cleaning. Just make sure it's fully dry before you use it again. This helps prevent any germs from hanging around.
- Handle with care: Don't drop your meter! These things aren't indestructible. Treat it gently to avoid damaging the internal components. Store it in its case when you're not using it.
When to Replace Test Strips
Test strips are like milk – they have an expiration date. Using expired strips can give you inaccurate results, which is the last thing you want. Here's what to keep in mind:
- Check the expiration date: Before you even open a new vial of test strips, check the expiration date. Make it a habit. Don't use them if they're past their prime.
- Discard opened vials after the recommended time: Some manufacturers recommend discarding opened vials after a certain period (e.g., 3-6 months), regardless of the expiration date. This is because exposure to air and humidity can affect the strips. Check the manufacturer's guidelines for specifics.
- Look for signs of damage: If the strips look discolored or damaged, don't use them. Better safe than sorry. It's always a good idea to have extra test strips on hand, so you're never caught short.
Storing Your Kit Properly
Where you keep your kit matters. Extreme temperatures and humidity can mess with the meter and strips. Here's how to store your kit like a pro:
- Keep it in a cool, dry place: Avoid storing your kit in the bathroom (too humid) or in direct sunlight (too hot). A drawer in your bedroom or a kitchen cabinet away from the stove is usually a good bet.
- Store strips in their original container: Don't transfer strips to a different container. The original vial is designed to protect them from moisture and light. This is super important!
- Avoid extreme temperatures: Don't leave your kit in the car on a hot day or in freezing temperatures. These conditions can damage the meter and strips. If you're traveling, keep your kit with you in your carry-on bag.
Taking good care of your diabetes test kit is a simple way to ensure accurate blood sugar readings and effective diabetes management. A little bit of attention can save you from unnecessary stress and help you stay on top of your health. So, keep it clean, store it properly, and replace those test strips when needed. You've got this!
Integrating Technology with Your Diabetes Management
Technology is changing how we handle diabetes, making it easier to track and manage our health every day. It's pretty cool how far things have come! Let's look at some ways tech can help.
Smartphone Apps for Tracking
Smartphone apps are super useful for keeping tabs on your diabetes. You can log your blood sugar levels, track your meals, and even set reminders for medications. Many apps also let you see trends in your data, which can help you understand how different foods or activities affect your blood sugar. Plus, some apps can share this info directly with your doctor, making appointments way more productive. It's like having a diabetes assistant right in your pocket!
Continuous Glucose Monitors
Continuous Glucose Monitors (CGMs) are a game-changer. Instead of fingersticks multiple times a day, a small sensor under your skin checks your glucose levels constantly. These readings are sent to a receiver or your smartphone, showing you real-time data and trends. This helps you catch highs and lows before they become a problem. Plus, some CGMs can even alert you if your blood sugar is dropping too low, which is a huge help, especially overnight. You can find glucose monitoring systems at many online retailers.
Data Sharing with Healthcare Providers
Sharing your diabetes data with your healthcare provider is easier than ever. Many devices and apps can automatically send your readings to your doctor's office. This means they can see how you're doing between appointments and make adjustments to your treatment plan as needed. It's all about working together to keep you healthy!
Using technology to manage diabetes can feel a bit overwhelming at first, but it's worth it. It can give you more control over your health and make it easier to live a full and active life. Don't be afraid to ask your doctor or a diabetes educator for help getting started. They can show you the ropes and help you find the tools that work best for you.
Here's a quick look at how technology can help:
- Easier tracking of blood sugar levels
- Better understanding of trends and patterns
- Improved communication with your healthcare team
Staying Motivated on Your Diabetes Journey
It's easy to feel overwhelmed when managing diabetes. There will be good days and bad days, and that's okay! The important thing is to keep moving forward. Let's talk about some ways to stay motivated and keep your eye on the prize – a healthier you.
Setting Realistic Goals
Don't try to overhaul your entire life overnight. Start small! Maybe your goal is to walk for 15 minutes three times a week, or to swap out sugary drinks for water. Small, achievable goals build momentum and confidence. Celebrate those little victories; they add up!
Celebrating Small Wins
Did you manage to keep your blood sugar in your target range for a whole week? Awesome! Did you resist that tempting dessert? High five! Acknowledge your successes, no matter how small they seem. It's all about building positive habits and reinforcing good behavior. Maybe treat yourself to a new book or a relaxing bath – something that makes you feel good without derailing your diabetes management.
Finding Support and Community
You are not alone! There are tons of people out there who understand what you're going through. Connecting with others who have diabetes can be incredibly helpful.
Here are some ways to find support:
- Join a local diabetes support group.
- Participate in online forums or communities.
- Talk to your family and friends about what you're experiencing.
Having a support system can make all the difference. Sharing your struggles and successes with others who get it can help you stay motivated and feel less isolated. Plus, you can learn new tips and tricks from each other!
Wrapping It Up
So there you have it! Picking the right diabetes test kit doesn’t have to be a headache. With a little bit of research and understanding of what you need, you can find a kit that fits your lifestyle and helps you keep your blood sugar in check. Remember, it’s all about making informed choices that work for you. Whether you go for a simple meter or a fancy continuous glucose monitor, the key is to stay proactive about your health. You’ve got this! Here’s to a healthier, happier you!
Frequently Asked Questions
What is a diabetes test kit?
A diabetes test kit is a tool that helps you check your blood sugar levels. It usually includes a blood glucose meter, test strips, and sometimes a lancing device to prick your finger.
How do I choose the right diabetes test kit for me?
To find the best diabetes test kit, think about your lifestyle, ask your doctor for advice, and consider your budget. Make sure the kit is easy to use and gives accurate results.
What should I look for in a diabetes test kit?
Look for a kit that is accurate, easy to use, and quick. Also, check how much blood you need for each test and if the meter has a memory function to store your results.
How often should I test my blood sugar?
The frequency of testing your blood sugar depends on your personal diabetes plan. Many people test before meals and at bedtime, but your doctor can give you specific advice.
What are common mistakes when using a diabetes test kit?
Common mistakes include not washing your hands before testing, using expired test strips, and not following the instructions properly. Make sure to read the manual.
How can I keep my diabetes test kit in good shape?
To maintain your kit, clean it regularly, store it in a cool, dry place, and replace test strips before they expire. Always follow the manufacturer's instructions for care.